How to plant Sesleria
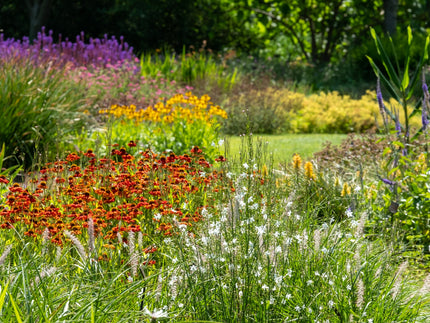
Sesleria is an evergreen, clump forming perennial ornamental grass which is resilient in terms of hardiness and grows happily in most soil types. In addition to year-round greenery provided by the foliage, small white panicles of fluffy flowers appear during summer, making this plant an excellent backdrop or foil for other plants. It’s also perfect for defining edges of borders and paths, and looks impressive in large swathes. Sesleria can also be planted into patio containers for contemporary and low-maintenance year-round display.
How to plant
— Plant Sesleria bare roots when supplied in spring between February and May. They require light and moisture and must be attended to soon after delivery. If you can't plant on the day of delivery, remove the roots from the packaging within 1-2 days and place in a bowl of water outdoors to soak, then plant within a week.
— All bare root ornamental grasses should be potted up and grown on for some time prior to transferring into borders.
— Soak the roots in water for 3-6 hours prior to planting. Pot into temporary 2 litre (or 15-20cm diameter) pots, using a good quality multi-purpose compost with added grit to aid drainage.
— Plant with the roots fully submerged in the compost. There will be some old foliage from the previous year. This should be left exposed above the soil surface. New shoots will emerge from the base of these dried stems.
— Grow them on in a sheltered spot outside. They can be transplanted to suitable growing positions after 2-4 months or once growth is established and the plants easily come out of the temporary pots with the soil held intact by the roots. A good indicator of when a plant is ready to be transplanted is when you see roots starting to emerge from the drainage holes in the bottom of the pot.
— When they’re ready to plant into the garden, choose a position in full sun or partial shade with moist but free draining soil. Dig over the area first to aerate the soil and remove any weeds.
— When planting into the garden, choose a position in full sun or light shade. Sesleria tolerates most soil types, including loam, clay, chalk and sand. Dig over the area first to aerate the soil and remove any weeds.
— It is recommend to add multipurpose compost to the planting hole when planting, this will add nutrients to the immediate area and provide a soft medium for new roots to grow easily.
— Position your your plant into the hole and backfill the hole with soil. Firm down after planting, ensuring the base of the stems remain level with the soil surface. Water thoroughly after planting.
— Sesleria can also grow well in patio containers. If it is intended to remain in a patio container, you can plant the bare root directly into a 30cm+ diameter patio container with fresh multipurpose compost, there is no need to pot up and grow on first in this instance.
— Sesleria should be spaced roughly 30-40cm apart from each other.
— Monitor your newly-planted Sesleria for pest damage and remove any excess growth from neighbouring plants in the border to reduce competition.
— This ornamental grass is fully hardy and doesn’t require winter protection unless temperatures fall below around -20C.
— Water-in after planting and keep hydrated when in growth, particularly during the first year. Once fully settled in, they can cope well with dry conditions.
— Bare root grasses will have some dried foliage from the past year still intact, young shoots may be visible at the base of the old foliage. Sesleria supplied in late spring will have some pale shoots which have already emerged. The shoots will soon start to green up after planting, watering and being exposed to daylight, additional new shoots will also emerge through summer.
Aftercare
— Sesleria require very little in terms of maintenance, but to keep it looking fresh you can remove dead foliage and old flowering stems when needed.
— Unlike many other grasses, this is a cool season grass, meaning it will put on growth during autumn and spring, and can die back a little in summer.
— Sesleria will form a clump over time. If the clump starts to look congested, you can lift and split clumps with a sharp spade in autumn or early spring. Each piece can then be replanted with sufficient space between them, or used in other parts of the garden.
— Cut back down to 10cm in early spring if needed to refresh and rejuvenate the plant.
Read further general instructions about planting bare-root ornamental grasses