How to plant Japanese Anemone
The perfect perennial for filling a shaded space with beautiful blooms which sway in the breeze, Japanese Anemones are resilient, hardy and easy to care for. They can tolerate winter temperatures down to -20C which makes them a useful, bushy border perennial which will fill a fair-sized gap over time and that you don't need to worry about. As they are hardy, they can be planted and grown outdoors from the day they're received, even if frosts are still likely. It is typical of Japanese Anemones to be slow to get going after they're planted, and although they make slow progress in the first year, they will produce some leaves over spring and summer while they settle in. They will be much more vigorous from the second year and eventually become one of those reliable garden perennials that you can look forward to seeing year after year.
Getting them started correctly is essential, below is your step-by-step guide:
How to plant
— Japanese Anemones are supplied as bare roots in spring for planting between February and May, and as 9cm root balls in autumn for planting between September and December. In either case, they can't survive for long without light and moisture and should be unpacked on the day of arrival and planted within a week. If you can't plant on the same day as delivery, place bare roots in a bowl of water positioned outside and plant in the next few days. 9cm root ball plants can be sat in a dish of water outdoors for up to a week prior to planting if you can't plant on the day of delivery.
—Soak bare roots in water for 3-6 hours prior to planting. Pot into temporary 2 litre (or 15-20cm diameter) pots, using a good quality multi-purpose compost.
—Plant with the roots submerged and with the buds at the top of the root system just level with the soil surface. Any shoots or leaves which have emerged already should be exposed above the soil surface after planting.
—Grow them on in a sheltered spot outside. They can be transplanted into suitable growing positions in a few month's time or once growth is established and the plants easily come out of the temporary pots with the soil held together.
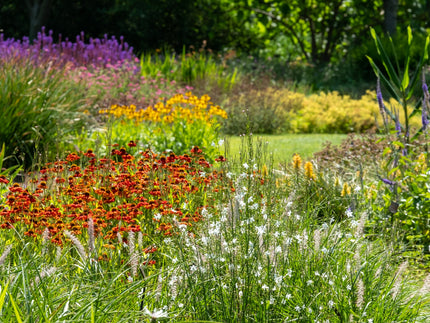
— When transferring into the garden, choose a position in partial, dappled or full shade with rich, moist but free draining soil. Japanese Anemones look great in a woodland-style setting among shrubs and small trees, but they can also be used to fill more contemporary shaded areas.
— Space the plants 20-30cm apart from each other if planting in groups. They will spread out over time.
— Pay close attention to them in the first year while they are small. Water-in after planting and keep hydrated when in growth. They will need watering whenever the soil feels dry during the first year.
Aftercare
— In the first year you should expect for your Japanese Anemone plant to remain compact and it may only produce leaves. Usually, they start to flower from the second year, and then more prolifically from the third year onwards.
— Japanese Anemones flower repeadly during summer and into autumn, you can deadhead when needed if preferred.
— In autumn, these perennials will become dormant and you can cut the stems down to around 3-5cm above grown level. Some leaves may remain at the base of the plant through winter. The following spring, the growth cycle will begin again.
— Read further general instructions about planting bare-root perennials


![[]](http://www.farmergracy.co.uk/cdn/shop/products/agapanthus-black-buddhist-1_325x.jpg?v=1575625838 "Agapanthus 'Black Buddhist'")
![[]](http://www.farmergracy.co.uk/cdn/shop/products/agapanthus-black-buddhist-4_325x.jpg?v=1627464050 "Agapanthus 'Black Buddhist'")