How to plant Malva
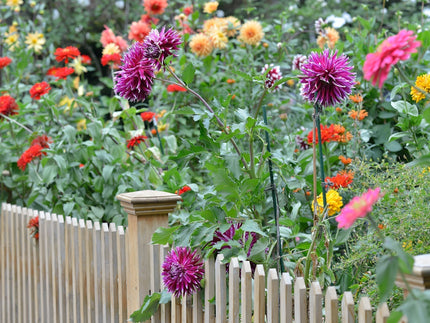
Malva brings a cheery pop of colour from summer through to early autumn, when other plants are starting to fade. This spreading, herbaceous perennial forms a rounded clump of foliage that fills gaps and softens the edge of borders. Its upright stems pop up between other summer perennials offering a nectar-rich meal for passing pollinators.
This woody perennial is a time-honoured favourite for cottage garden borders. Its free and easy habit fits beautifully into informal planting schemes and wild flower meadows. Fuss free and perfectly hardy, Mallow needs virtually no maintenance once planted, making the perfect easy-going addition to any sunny, well drained border. Here's how to give them the best start...
How to plant:
— Plant as soon as possible after delivery, ideally within a week. Malva (Mallow) is supplied as a 9cm root ball plant, like a potted plant with soil on the roots. Malva plants supplied as root balls will require watering straight away when they arrive - if you can't plant or pot them up immediately, take the plant out of its packaging, sit it in a shallow dish of water and position in a bright place so it can remain hydrated and healthy until you are ready to plant.
Malva supplied as root balls are slightly more established than bare roots and can often be planted directly into a clear space in a well cultivated border, depending on the soil type, moisture levels and growing conditions. The soil must be weed-free, dug over and crumbly. Avoid planting your new plant into a space which will become over-crowded by more established plants as it will struggle to compete and could fail if it doesn't have sufficient space and light.
— If growing conditions are more challenging, these plants should be potted up and grown on outdoors in 15-20cm pots with multipurpose compost. They can be transplanted to borders once they are more established, allowing 30-40cm between each plant. The plant will be ready to plant out into a border when it has grown enough in its temporary pot to hold the soil together with its roots.
— Plant so that the root ball is fully submerged in the compost, leaving the buds/crown slightly below the surface. Any young shoots/leaves or stems should be left exposed above the soil surface. Water well after planting and continue watering regularly whenever the soil starts to dry out.
— If planting Malva root ball plants directly into a clear space in a border, choose a sunny position with rich, free-draining soil. Add multipurpose compost to each planting hole to help the new roots grow and water well afterwards. Mark with a plant label or cane so you can identify and monitor the new plant in the border and keep the area clear of weeds or competing plants.
— Malva are sun-loving plants and are well adapted to drier conditions. They don't like to be in wet soil all the time, but do water immediately after planting and continue watering regularly in the first spring and summer when the soil starts to feel dry 3-5cm below the surface.
— Malva are hardy plants, there is no need to protect them from frost over winter, although in their first winter the may need some mulch around them during very cold snaps.
— When supplied in autumn, Malva may not yet have visible buds or shoots. buds should start to swell in early spring. They will produce leaves in spring, but they may not flower in the first summer
Aftercare
— Mallow may be deciduous or semi-evergreen, sometimes retaining some of its foliage throughout the winter months.
— When grown on rich soil, Malva can produce taller stems that may require some support during their flowering period.
— Cut back stems in autumn down to around 20-30cm from ground level.


![[]](http://www.farmergracy.co.uk/cdn/shop/products/agapanthus-black-buddhist-1_325x.jpg?v=1575625838 "Agapanthus 'Black Buddhist'")
![[]](http://www.farmergracy.co.uk/cdn/shop/products/agapanthus-black-buddhist-4_325x.jpg?v=1627464050 "Agapanthus 'Black Buddhist'")