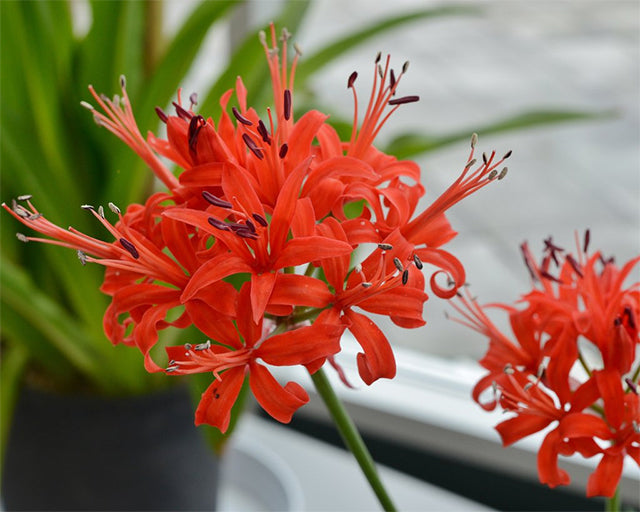
Nerines! All about Nerine Bulbs
By Naomi Jones
Late-flowering nerines are easy to grow and highly rewarding. Each bulb produces multiple long, slender stems topped with large rounded clusters of exquisite lily-like flowers, injecting much-needed fresh colour into the garden just as other flowers are starting to fade.
Spring is the best time to plant nerine bulbs. Most are fully hardy, so once you’ve planted them you don’t have to worry about moving them to a frost-free place for winter unless the temperatures are likely to dip below -10C. Otherwise, you can just look forward to a fuss-free and vibrant display in autumn, year after year.
Another great benefit to growing nerines is that they make wonderful cut flowers, with good fragrance and a long vase life. They have very long flowering stalks which enable them to be used in tall displays, but they look equally lovely in rustic cottage-garden bouquets with other late flowerers, like dahlias, rudbeckia, eryngium and echinacea.
Nerines in brief:
- Grown from bulbs
- Plant in spring
- Height 60c
- Spread 30cm
- Grows in any free-draining soil
- Suitable for containers and borders
- Thrives in full sun or partial shade
- Flowers during summer and autumn
- Hardy to -10C
- Suitable for cutting
- Fragrant flowers
- Attracts bees and butterflies
How to grow nerines from bulbs
Plant your nerine bulbs as soon as they arrive in spring. It’s a good idea to start them off in pots to allow a root ball to form before planting outside. For best results, each bulb should be planted individually in 9cm pots.
Fill each pot with heavy compost or garden soil and position the bulbs with the roots under the surface and the top of the bulb exposed. Firm down the soil around the bulb and water in. Water lightly whenever they become dry, but don’t allow them to sit in waterlogged soil.
Grow them on until their roots fill the pots before planting out. Depending on how early in spring they were planted, this should be around early summer.
Try to keep the root ball in-tact when removing from the pots and plant them outside into their permanent locations. For an eye-catching display, plant them in groups or swathes of three or more, spaced at around 20cm apart.
Consider combining your nerines with late-summer flowering or winter varieties to provide effortless continuation. They look fantastic underplanted with ground cover or winter bedding, as well as among shrubs and flowering perennials.
Allow the stems to die back fully in winter before cutting them off. The foliage will take longer to die back but can be removed the following spring once it has turned yellow.
Over time your nerines may self seed and begin to naturalise producing bigger and better displays. You can also divide them by digging them up separating them, then replanting in other areas (this can be done in spring).
Four beautiful nerines…
-
Nerine bowdenii ↑
This classic nerine variety is easy to grow and reliable and has won a prestigious RHS Award of Garden Merit. Beautiful pale pink blooms are produced during autumn.
-
Nerine bowdenii 'Alba' ↑
Tall stems are topped with pure white flowers during autumn. Looks sophisticated in contemporary planting schemes and useful for providing autumn interest in white gardens.
-
Nerine Mr John ↑
This vivid pink nerine variety looks wonderful in mixed borders planted among late-flowering perennials. Alternatively, it creates a great display in containers, providing a fresh pop of colour with its impressive flowers during autumn.
-
Nerine sarniensis ↑
This nerine variety has beautiful red flowers and is ideal for growing in a sheltered location. It’s not frost hardy, so it does require protection during winter with a thick mulch and fleece. Alternatively, it can be lifted and stored for winter in a greenhouse.
 |
Naomi Jones |



2 comments
I’m delighted to see such detailed description of Nerine lillies. This bulb is one of .y favourites
I’m delighted to see such detailed description of Nerine lillies. This bulb is one of .y favourites